ND vs Polarizer vs Diffusion: Filters Made Easy
Ever wondered why your shots still feel flat, even with good gear?
It might be the filters we’re not using. This guide breaks down ND, Polarizer, and Black Diffusion filters in plain language so we can finally shoot like pros, not just look like we know what we’re doing.
🕶️ ND Filter = Sunglasses for Your Lens

What it does:
Cuts down the light entering the camera.
Helps maintain wide apertures and slow shutter speeds, even in bright daylight.
Lets us control exposure physically instead of fixing it later.
When to use it:
Long exposure shots in daylight.
Video shoots outdoors at f/2.8 or lower for that creamy background blur.
Types:
Fixed ND: Cuts a specific amount of light.
Variable ND: Twist to adjust. More flexible, but might introduce cross-patterns on wide lenses.
Beginner takeaway: If your shutter speed is locked for video and the image is still too bright, ND is your new best friend.
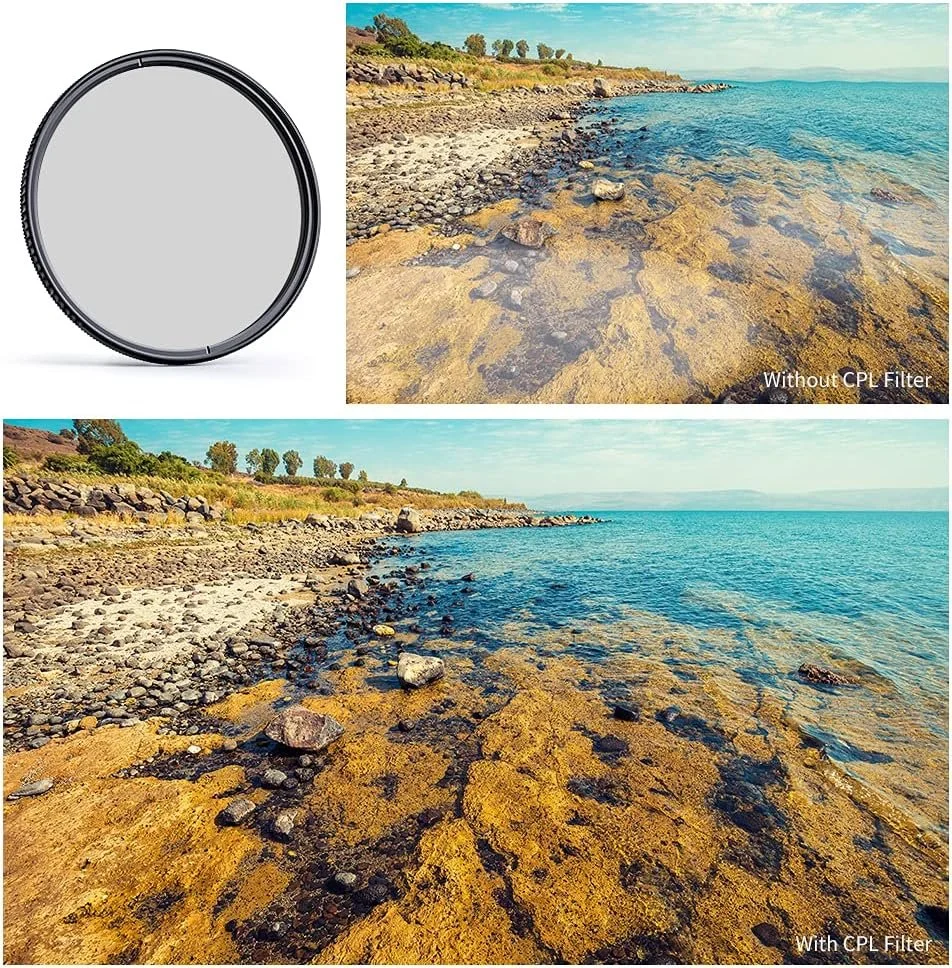
🌀 Polarizing Filter = Anti-Glare & Color Pop Wizard

What it does:
Reduces reflections on glass and water.
Enhances skies and greenery.
Deepens color saturation naturally.
When to use it:
Shooting landscapes or cityscapes with windows.
Outdoors when reflections are messing with the look.
How it works:
Rotate the front ring to control the amount of polarization. It works like a physical saturation dial, smarter and more subtle than editing filters.
Beginner tip: Less “deep fried meme,” more cinematic richness.
🌫️ Black Diffusion = Mood Creator, Not Blur Machine

What it does:
Softens highlights without destroying detail.
Adds a cinematic glow to light sources.
Creates a nostalgic or dreamy tone in visuals.
When to use it:
Portraits, romantic scenes, product shots.
Music videos and emotional storytelling.
Strength:
Start with 1/4 strength — it’s often the sweet spot. 1/2 strength can be overkill for general YouTube use.
💡 Can Filters Be Combined?
Yes, and the results can be amazing:
ND + Black Diffusion = Outdoor cinematic talking head.
Polarizer + ND = Bright, glare-free travel footage.
Black Diffusion + Polarizer = Stylized, color-rich music video.
But be cautious. Stacking filters increases the chance of vignetting. A better approach is to buy filters in a large size (like 82mm) and use step-up rings for smaller lenses.
Pro tip: Don’t stack a bunch of step-up rings like LEGO bricks. That “cone of shame” can actually make vignetting worse.
🎒 What to Actually Buy (Without Going Broke)
A simple, beginner-proof kit:
Variable ND filter – True color models with 6 to 9 stops.
Circular Polarizer – B+W, Hoya, or Tiffen offer great value.
1/4 Black Diffusion – Just enough mood without going full dream-sequence.
Step-up rings – One per lens makes setup easier and quicker.
I’ve added affiliate links to my filters in here. Choose what fits your needs and budget.
🧪 Low-Budget Filter Hacks
Not ready to spend just yet? Try these:
Sunglasses as a temporary ND alternative.
Vaseline or a Ziploc bag on a clear filter for diffusion (a trick borrowed from old Hollywood).
These aren’t permanent solutions, but they work in a creative pinch.
🧵 The Wrap-Up
Here’s your cheat sheet:
ND helps control exposure in bright conditions.
Polarizer reduces glare and boosts color.
Black Diffusion adds softness and mood to your shots.
Instead of jumping into color grading packs or expensive lenses, try filters first. They can give your footage a cinematic feel with minimal effort and cost.
And now that you know which filters to add to your toolbox, you can go out and shoot. To help you shoot and publish your content efficiently, I've created a guide with three levels of content planning. This guide can help whether you're just starting out or already experienced in publishing online.